A car battery health check is a comprehensive diagnostic procedure used to evaluate the condition of a vehicle’s starting and charging system. It involves measuring the resting voltage, testing the Cold Cranking Amps (CCA) under load, and verifying the alternator’s ability to recharge the battery, ensuring the vehicle starts reliably in all weather conditions.
The Critical Importance of Battery & Charging System Analysis
The modern automobile is more reliant on electricity than ever before. From advanced infotainment systems and heated seats to Start-Stop technology and essential ECU functions, the demand placed on your vehicle’s 12-volt ecosystem is immense. A car battery health check is not merely about determining if your car will start today; it is about predicting whether it will start tomorrow, next week, and during the coldest morning of the year.
Many drivers mistakenly believe that a battery works in isolation. In reality, the battery, starter, and alternator form a symbiotic triad. If one component fails or underperforms, it places undue stress on the others, leading to a cascade of expensive repairs. For instance, a weak battery can force an alternator to work overtime, burning out its internal diodes, while a failing Starter Motor Problems Diagnosis & Repair Auckland can draw excessive amperage, rapidly depleting a healthy battery.
Signs Your Charging System Needs Attention
Before diving into the technical testing procedures, it is vital to recognize the symptoms of a degrading electrical system. While the “Check Battery” light on the dashboard is the most obvious indicator, many batteries fail without ever triggering a warning light until it is too late.
Slow Engine Crank
If the engine sounds sluggish or takes longer than usual to turn over (“rur… rur… rur” sound), this is the classic sign of reduced Cold Cranking Amps (CCA). The battery has enough voltage to engage the starter solenoid but lacks the amperage to spin the engine at the necessary speed for ignition.
Dimming Headlights
If your headlights dim significantly when you are idling but brighten when you rev the engine, this often points to an alternator issue or a battery with low reserve capacity. It indicates that the charging system cannot keep up with the electrical load at low RPMs.
Electrical Component Issues
Modern vehicles often disable non-essential electrical consumers (like heated seats or start-stop functions) when the battery state of charge (SoC) drops below a certain threshold. If your power windows are slow or your radio resets unexpectedly, a car battery health check is overdue.
Step 1: Visual Inspection and Terminal Cleaning
A surprising number of charging issues are not caused by internal battery failure but by poor external connections. Electricity requires a clean, tight path to flow efficiently. Resistance caused by corrosion or loose fittings can mimic a dead battery.
Identifying Corrosion
Inspect the battery terminals (posts) and the cable clamps. You are looking for a white, blue, or greenish powdery substance. This is lead sulfate or copper sulfate, resulting from a reaction between the sulfuric acid fumes and the metal terminals. This corrosion acts as an insulator, preventing current from flowing to the starter.
The Cleaning Process
To perform a proper terminal cleaning, follow these steps:
- Safety First: Wear safety glasses and gloves. Battery acid is corrosive.
- Disconnect: Always disconnect the negative (-) cable first, followed by the positive (+) cable. This prevents shorting the battery to the chassis with your wrench.
- Neutralize: Create a paste using baking soda and water. Apply this to the terminals. You will see it fizz as it neutralizes the acidic corrosion.
- Scrub: Use a wire battery terminal brush to scrub the posts and the inside of the cable clamps until they shine with bare metal.
- Protect: After reconnecting (Positive first, then Negative), apply a thin layer of dielectric grease or battery terminal spray to seal the connection against oxygen and moisture.
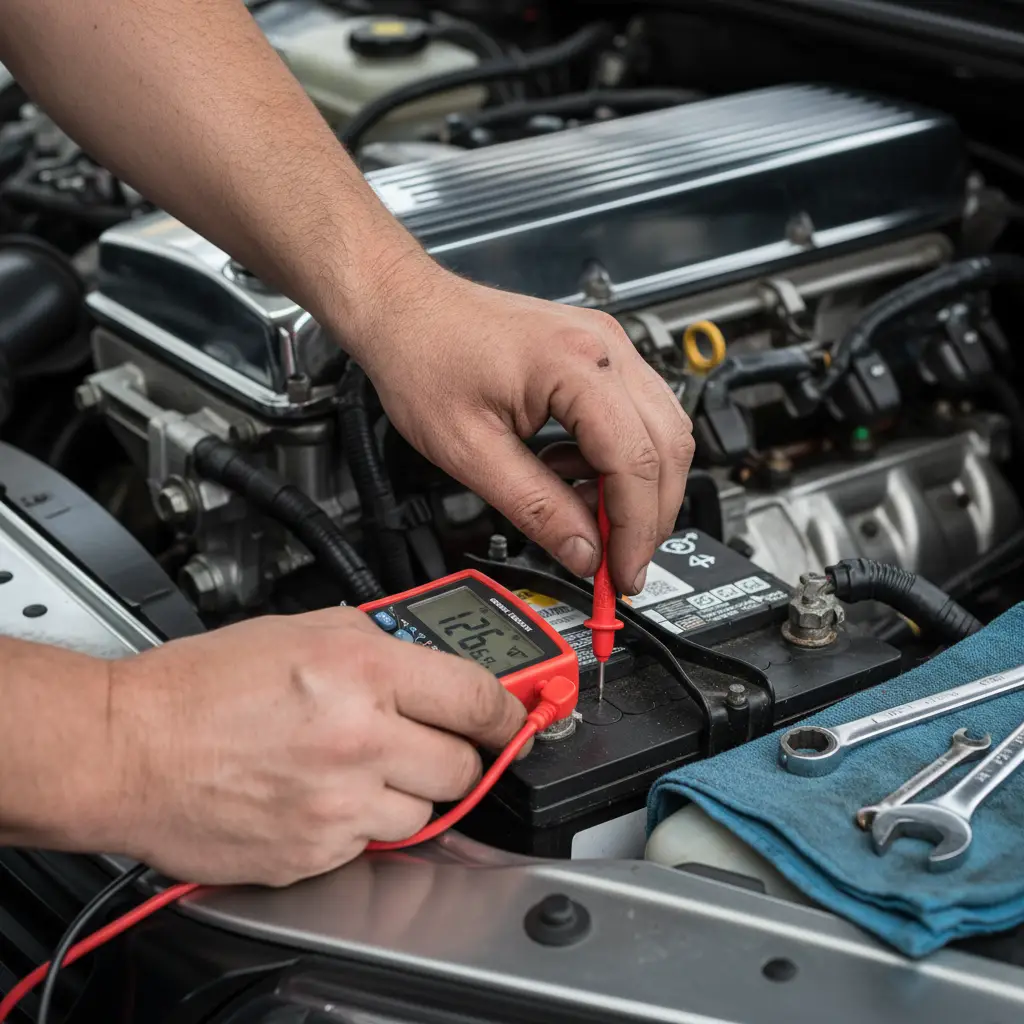
Step 2: Static Voltage Testing
Once the physical connection is verified, the next phase of the car battery health check is measuring the State of Charge (SoC). This is done using a digital multimeter set to DC Volts (20V scale).
Procedure: Ensure the car has been off for at least an hour to remove the “surface charge” (the artificially high voltage immediately after driving). Connect the red probe to the positive terminal and the black probe to the negative terminal.
- 12.60V or higher: 100% Charged. The battery is chemically sound regarding voltage.
- 12.40V – 12.50V: 75% Charged. Acceptable, but may need a recharge soon.
- 12.20V – 12.40V: 50% Charged. The battery is weak and may fail under load.
- 11.90V or lower: Discharged. The battery may be damaged or deeply drained.
It is important to note that voltage is like water pressure—it tells you the potential is there, but it doesn’t tell you the volume (amperage) available. For that, you need a load test.
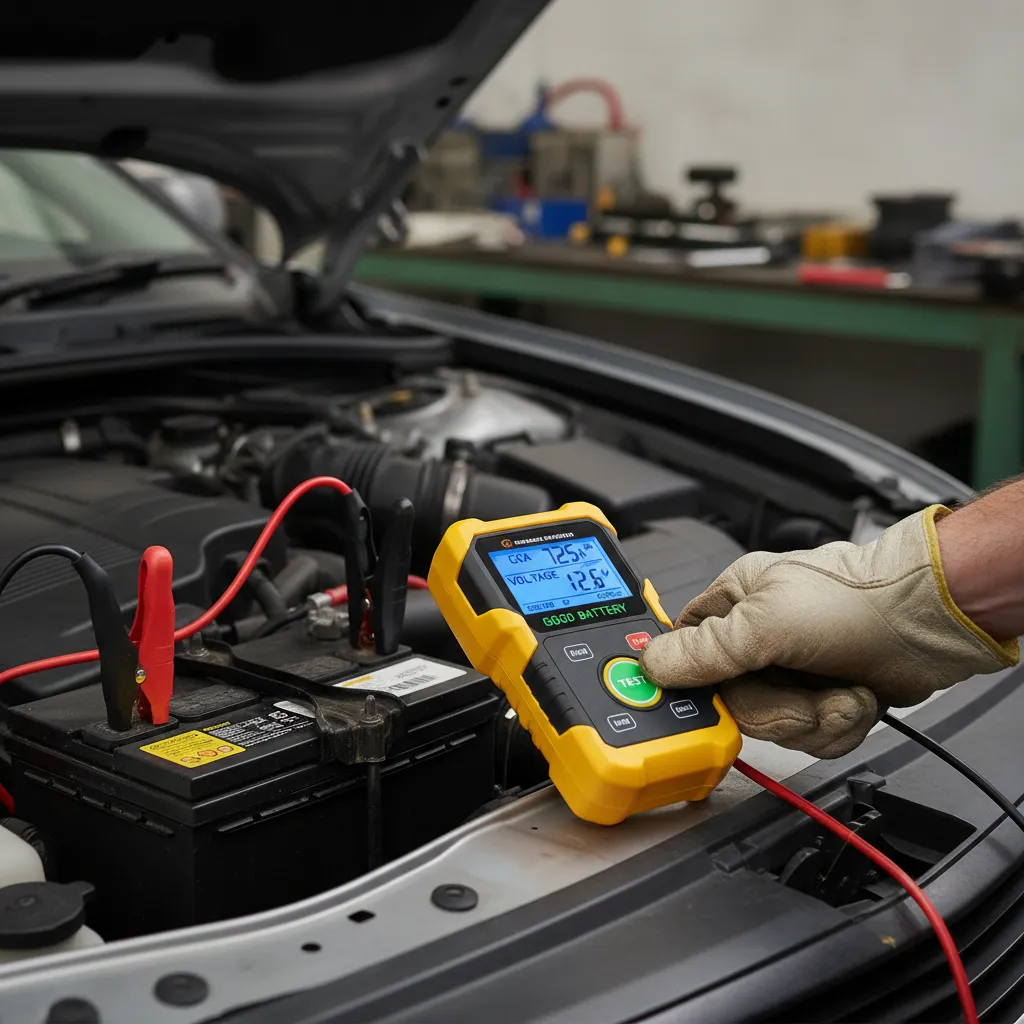
Step 3: Load Testing the Battery
Load testing is the definitive way to determine if a battery can handle the immense energy spike required to start an engine. A battery might show 12.6 Volts but drop to 8 Volts the moment you try to crank the engine. This is because the internal lead plates may be sulfated or damaged, reducing their surface area.
Using a Carbon Pile Load Tester
A traditional load tester applies a physical resistive load (generating heat) to the battery, simulating a starter motor. To pass this test, the battery voltage must not drop below 9.6 Volts while under a load equal to half its CCA rating for 15 seconds.
Using a Digital Conductance Tester
Modern professional shops use digital conductance testers. These devices send a small frequency signal through the battery to measure the internal resistance and estimate the available CCA. This method is safer, generates no heat, and provides a highly accurate assessment of the battery’s remaining life.
If your battery is rated for 600 CCA but tests at 300 CCA, it has lost half its capacity and should be replaced immediately, especially before winter.
Step 4: Alternator Output Verification
Replacing a battery without checking the Alternator Repair & Replacement is a recipe for a repeat failure. The alternator is responsible for replenishing the battery while the engine runs. If the alternator is weak, the new battery will drain; if the alternator overcharges, it will boil the electrolyte out of the new battery.
The Charging Voltage Test
With the engine running, connect your multimeter to the battery terminals. A healthy charging system should produce between 13.5 Volts and 14.5 Volts.
- Below 13.5V: Undercharging. The alternator may have worn brushes or a bad voltage regulator. The battery will eventually die.
- Above 14.8V: Overcharging. This can damage the battery and sensitive vehicle electronics.
Load Verification
Turn on high-draw accessories: headlights (high beams), AC blower fan, and rear defroster. The voltage should remain above 13.5V. If it drops significantly (e.g., to 12.8V), the alternator cannot keep up with the demand.
For a deeper dive into automotive electrical systems, authoritative resources like Wikipedia’s guide on Lead-Acid Batteries provide excellent background on the chemical processes involved.
Step 5: Parasitic Drain Diagnosis
If your battery tests good and your alternator is charging correctly, but your car is dead after sitting for two days, you likely have a parasitic drain. This occurs when an electrical component (like a glove box light, aftermarket alarm, or a stuck relay) continues to draw power after the car is turned off.
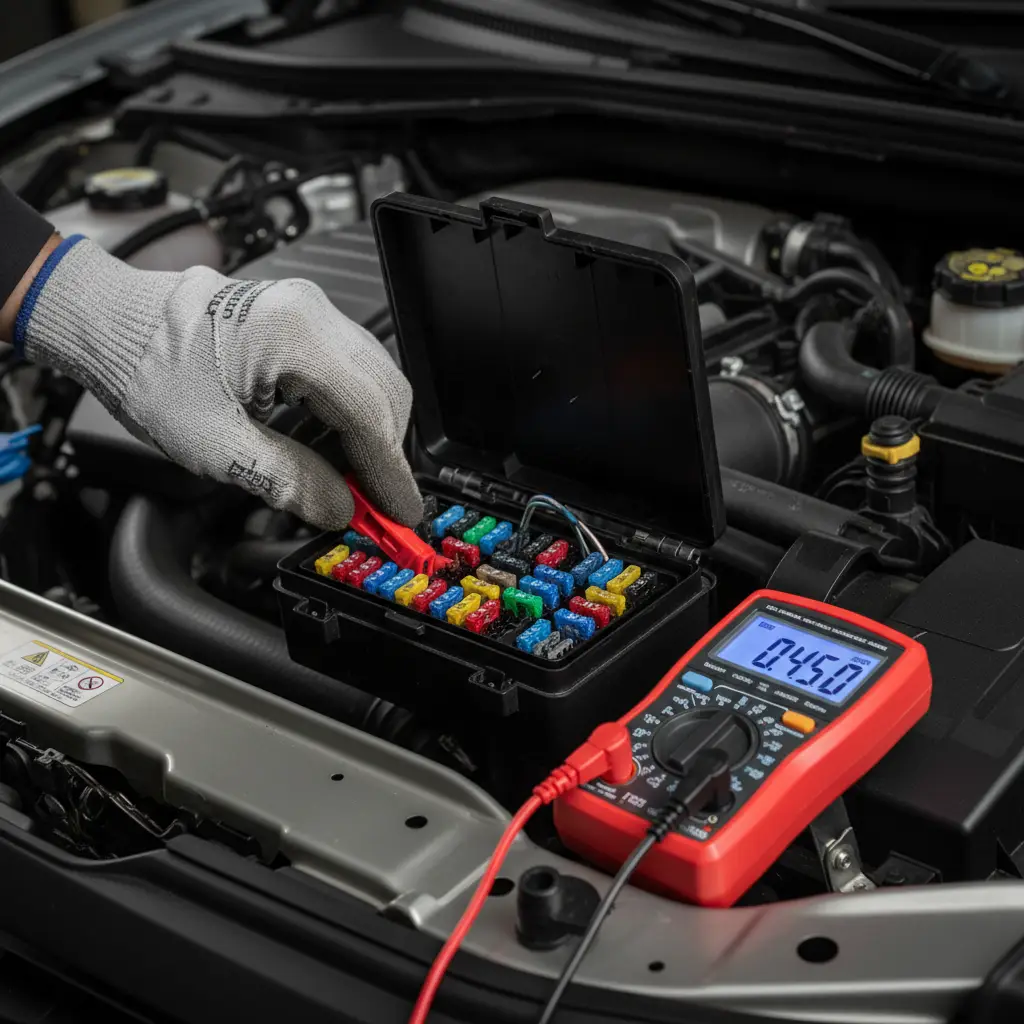
How to Test for Parasitic Draw
- Setup: Turn off the engine and all accessories. Close all doors (or latch the mechanisms so the car thinks they are closed).
- Ammeter Connection: Disconnect the negative battery cable. Set your multimeter to measure Amps (10A or 20A setting). Connect the meter in series: one probe on the negative battery post, the other on the disconnected cable clamp.
- Wait for Sleep Mode: Modern cars have computer modules that take time (10 to 45 minutes) to go into “sleep mode.”
- The Reading: A normal parasitic draw is usually under 50 milliamps (0.05A). If you see a reading of 0.50A or higher, something is draining the battery.
- Isolating the Circuit: While watching the meter, pull fuses one by one. When the amperage drops significantly, you have found the circuit causing the drain.
Professional vs. DIY Testing
While a multimeter is a fantastic tool for a DIY car battery health check, it has limitations. It cannot perform a true load test or measure the “ripple current” (AC voltage leaking from a bad alternator diode). Mobile Vehicle Service: Expert Care for Your Car On-the-Go utilize advanced battery analyzers that print out a detailed health report.
If you suspect a complex issue, such as an intermittent parasitic drain or a smart-charging system fault (common in BMW and Mercedes-Benz), professional diagnostics are recommended. However, for 90% of scenarios, following the steps outlined above—cleaning terminals, checking voltage, and verifying alternator output—will accurately diagnose the problem.
Proper disposal of old batteries is also critical. Lead-acid batteries are hazardous waste. According to the EPA, roughly 99% of lead-acid batteries are recycled, making them one of the most recycled consumer products in the world. Always return your old battery to the retailer or a recycling center.
Frequently Asked Questions (PAA)
How often should I perform a car battery health check?
How often should I perform a car battery health check?
You should perform a car battery health check twice a year, ideally before the extreme temperatures of summer and winter. Additionally, have it tested whenever you notice slow cranking or dimming lights, or if the battery is more than three years old.
Can a car battery be good but just need recharging?
Can a car battery be good but just need recharging?
Yes. If a battery is discharged due to leaving lights on or short trips, it may just need a recharge. A load test performed after fully recharging the battery is the only way to confirm if the internal chemistry is still healthy.
What is a normal voltage for a car battery when the car is off?
What is a normal voltage for a car battery when the car is off?
A healthy, fully charged car battery should read approximately 12.6 volts or higher when the engine is off and the vehicle has been sitting for at least an hour. A reading below 12.4 volts indicates the battery is partially discharged.
How do I know if it is my battery or my alternator?
How do I know if it is my battery or my alternator?
If the engine starts but dies immediately, or if the battery dies while driving, it is likely the alternator. If the car struggles to start but runs fine once going, it is likely the battery. A multimeter test showing roughly 14 volts while running confirms the alternator is working.
Does cold weather affect car battery health?
Does cold weather affect car battery health?
Yes, significantly. Cold weather slows down the chemical reaction inside the battery, reducing its power output. At 32°F (0°C), a battery loses about 35% of its strength, while the engine requires more power to turn over due to thickened oil.
What is the average lifespan of a car battery?
What is the average lifespan of a car battery?
The average lifespan of a car battery is between 3 to 5 years. Factors such as extreme climates (both hot and cold), frequent short trips, and vibration can significantly shorten this lifespan.